

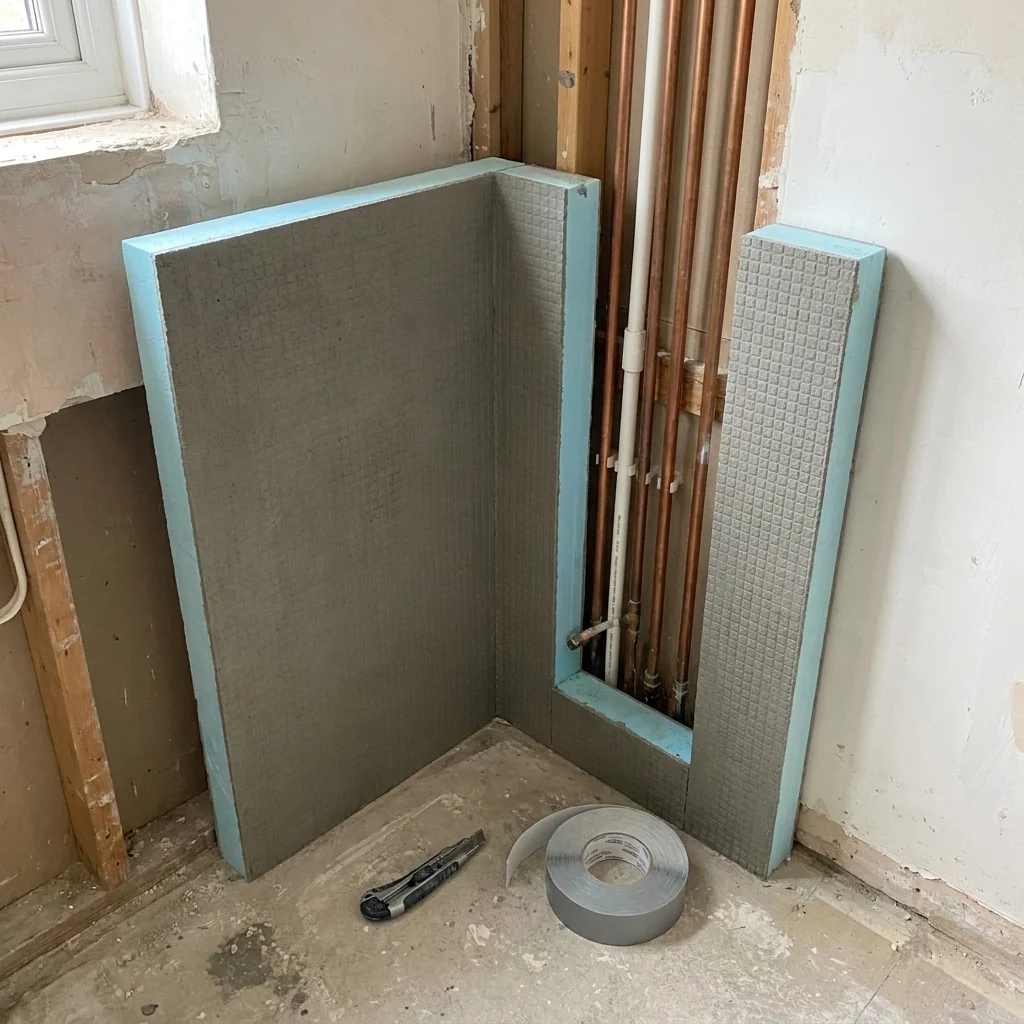
You do not need a timber frame. Pre-formed XPS angle boards — waterproof tile backer panels factory-scored to fold into a clean L-section — let you box in a soil stack, radiator drop or cistern feed in minutes and tile straight over the result, with no studs, no MDF and no wood sitting inside a wet room.
Pipe boxing is one of those jobs where the standard advice has not caught up with the materials. Ask on a DIY forum and the answer is still battens and MDF. This article covers why that method struggles in bathrooms, and the step-by-step angle-board alternative — including how to keep access to valves and how to tile the finished box.
Why Box Pipes In at All?
Almost every bathroom and kitchen has pipework that cannot disappear into the wall: a soil stack in the corner, radiator or towel-rail drops, the cistern feed behind a WC, a waste run along a floor junction, or a service riser passing through the room. Boxing them in tidies the room, protects the pipes from knocks, and — most importantly for a tiled space — creates flat, square surfaces the tiling can carry across without interruption. The catch is that the boxing then lives in the most humid room in the house, sometimes inside a shower zone that gets directly wet every day. Whatever the box is built from has to be comfortable with that.
The Traditional Method: Battens and MDF
The conventional build is carpentry. Softwood battens are screwed to the walls and floor to form a frame, the frame is skinned with MDF or plywood, and the box is then filled, primed and painted — or tiled. It is still the method most DIY forums recommend, and in a dry hallway it is perfectly serviceable.
In a bathroom its weaknesses show quickly. MDF and softwood are exactly the moisture-sensitive materials a wet room is supposed to exclude: MDF swells at its cut edges on nothing more than steam, and battens sitting on a bathroom floor are the first thing to rot after a minor leak. The build itself is a multi-stage job — frame, skin, fill, prime — that can pull a second trade into a small task. And the finished skin is still not a tiling background: tiling onto painted MDF is a bond failure waiting to happen, so the box that took a morning to build is still not ready for the tiler.
The Angle-Board Method, Step by Step
Insutile® Angle Board is the purpose-made alternative: a rigid XPS backer board panel, factory-scored so it folds to a crisp 90-degree L-section straight out of the pack, with custom angles available to order. The cementitious faces take tile adhesive directly, the closed-cell core is waterproof, and the folded section is self-supporting — which is exactly what makes the timber frame unnecessary.
1. Measure and mark
Measure the length of the run and the projection needed from each wall, keeping a sensible clearance around the pipework. Angle Board legs run from 150 × 150 mm up to 400 × 200 mm, so most stacks and pipe runs are covered by a stock profile.
2. Cut to length
Cut the L-section to length with a utility knife and a straight edge — no saw, no dust, no workshop. Openings for pipe entries and brackets cut just as cleanly.
3. Bond and mechanically fix
Bond the legs of the angle to the adjoining walls and floor with an adhesive suited to the substrate, then add mechanical fixings — screws and washers through the legs into the wall — so the box does not rely on the bond line alone. On long vertical runs, work section by section and butt the sections tightly together.
4. Seal the joints
Bed alkali-resistant joint tape over every junction — where the angle meets the walls, where sections butt, and around any cut openings — and run the system sealant along the floor junction. The tapes, washers and sealants are all in the accessories range. Inside a shower zone, these joints tie into the tanking of the surrounding walls so the box becomes part of one continuous waterproof layer.
5. Tile
The box is now a tiling background like the rest of the wall — no priming, no waiting. The full fixing and sealing sequence is set out in our installation guides.
Keep Access to Valves and Fittings
Boxing should never bury anything that will one day need a hand on it: isolation valves, rodding points, waste access, flexible connectors. Plan an access panel at each of these before the first board is fixed. The simplest approach is to frame the opening at the boarding stage and fit a removable tile-faced panel — proprietary magnetic or screw-fixed access panels both work well — so a future plumber lifts one panel instead of breaking out tiles. Angle Board's modular structure makes it straightforward to build a removable panel into the run without weakening it.
Tiling Over the Box
Tile the box with a solid bed of C2-class cement-based adhesive — full contact, not dabs, because the faces of a pipe box take knocks in service and every void is a weak point. Small and mid-format tiles wrap the geometry more gracefully than large-format sheets, and the external corner is best finished with a tile trim or a mitred edge rather than an exposed cut.
One junction rule matters more than the rest: where the box meets the floor, the wall or a shower tray, that joint is a movement junction — fill it with silicone sealant, not grout. Grout bridging two different constructions cracks, and a cracked joint at the foot of a pipe box is a water entry point. How boxing fits into the wider wet-area build-up is covered in our bathroom solutions overview.
Battens-and-MDF vs Pre-Formed XPS Angle at a Glance
| Criterion | Timber battens + MDF | Pre-formed XPS angle board |
|---|---|---|
| Build time | Multi-stage — frame, skin, fill, prime | Measure, cut, bond, fix — minutes per run |
| Waterproof | No — MDF swells, battens rot after leaks | Yes — closed-cell XPS core, sealed joints |
| Tile-ready | No — painted MDF gives a poor adhesive bond | Yes — tile directly onto the cementitious face |
| Weight | Heavy — timber plus sheet material | Light — one person positions and fixes each section |
| Pipe noise & condensation | Hollow box amplifies noise; cold pipes sweat inside | Insulating XPS core damps pipe noise and reduces condensation |
| Access panels | Ad-hoc carpentry, rarely tile-faced | Removable tile-faced panels integrate into the run |
Frequently Asked Questions
Can you tile directly onto MDF pipe boxing?
It is not recommended. MDF moves with moisture and its painted or bare face gives a poor bond for cement adhesives, so tiles debond and joints crack. Either overboard the existing boxing with a thin XPS backer board and tape the joints, or rebuild the box in pre-formed angle board and tile it directly.
How do you box in a soil pipe inside a shower?
Treat the box as part of the tanked enclosure, not furniture inside it: XPS angle board bonded and fixed around the stack, every joint taped and sealed into the wall waterproofing, movement junctions siliconed, and the whole box tiled like the rest of the wet zone. No timber anywhere in the build-up.
What do you fix angle board to?
Masonry, stud walls or sound existing tile — bond the legs with an adhesive suited to the substrate and add screw fixings with washers, using plugs on solid walls. Check for hidden pipe and cable runs before drilling, and keep fixings clear of the pipework being concealed.
Does boxing in pipes cause condensation problems?
Cold-water pipes sweat when warm, humid air reaches them, so an unsealed hollow box can drip inside. A sealed, insulating XPS enclosure reduces the warm-air contact that drives the problem — and lagging the cold pipes inside the box before closing it up remains good practice on any method.
Boxing in pipework on your next refit? Explore Insutile® Angle Board, pick up the tapes and sealants in the accessories range, or talk to our technical team for a project-specific detail.