

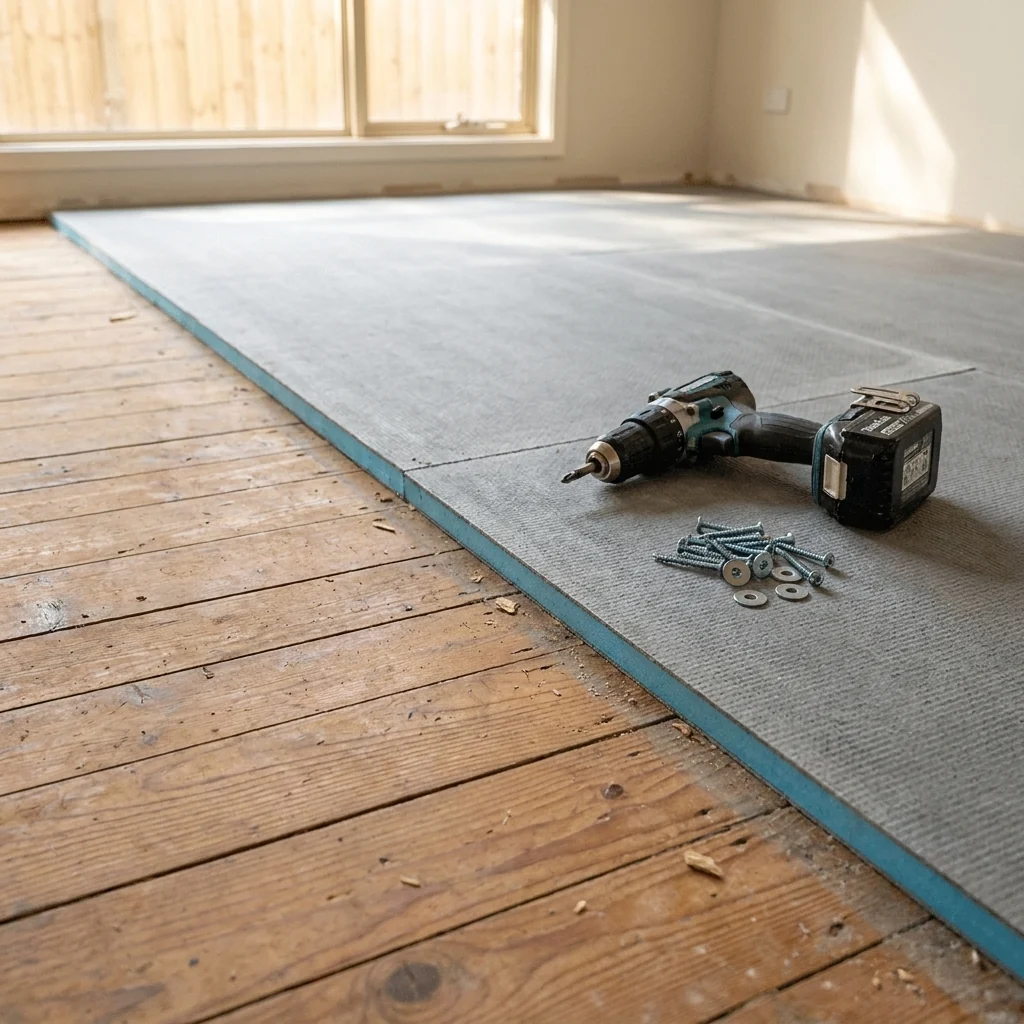
No — not directly. Timber floorboards flex underfoot and move with every change in temperature and humidity, and rigid tiles bonded straight onto them crack, debond or shed their grout lines — often within the first year. The floor needs a rigid intermediate layer first: traditionally a thick plywood overboard, and in modern practice a thinner, lighter, waterproof XPS tile backer board.
This article looks at why floorboards fail as a tiling background, compares the plywood and XPS overboarding routes, and walks through the overboarding sequence step by step — including which board thickness to specify and how underfloor heating changes the picture.
Why Tiling Straight Onto Floorboards Fails
The first problem is deflection. Floorboards are designed to span between joists and give slightly under load — a flexibility you feel as a faint spring underfoot and hear as the occasional creak. Tiles and cement adhesive form a rigid, brittle layer with almost no tolerance for that movement. Every footfall flexes the boards by a fraction of a millimetre; the tiled layer above cannot follow, so the stress relieves itself at the weakest line — a grout joint, a bond line, or the tile itself.
The second problem is moisture movement. Timber is hygroscopic: it takes on moisture in humid months and releases it through the heating season, expanding and shrinking as it does. Individual boards also cup, twist and swell if they get damp — and in a bathroom or kitchen, sooner or later they will. A substrate that changes dimension season by season is the opposite of what a bonded tile bed needs.
British Standards reflect both problems. BS 5385-3, the code of practice for floor tiling, does not treat board-on-joist timber floors as a suitable background for direct tiling, and in areas subject to wetting the guidance is firmer still — moisture-sensitive timber backgrounds do not belong directly beneath a tiled finish in damp conditions. The accepted answer, in the standard and on site, is a rigid intermediate layer fixed over the floorboards before any tile is laid.
The Traditional Fix: Plywood Overboarding
The long-standing site remedy is to overboard the floorboards with plywood — commonly 18 to 25 mm for a properly stiff result — screwed down at close centres. It works, and for decades it was the only practical option. But it carries real costs. A thick ply overboard raises the finished floor level substantially once adhesive and tile go on top, which means trimmed doors, stepped thresholds and awkward transitions to adjoining rooms. Full-size sheets are a heavy two-person lift up a staircase. Plywood is not waterproof — in a bathroom it still needs priming or a tanking layer before tiling. And it adds no thermal performance whatsoever: a cold floor stays a cold floor.
The Modern Fix: XPS Tile Backer Board
An XPS tile backer board such as Insutile® Build Board takes a different route to the same rigidity. A closed-cell extruded polystyrene core is faced on both sides with a cementitious, fibreglass-reinforced coating; bonded and screwed over the floorboards, the composite panel stiffens the deck at a fraction of the thickness and weight of structural ply. The core is inherently waterproof — water absorption of 0.1 percent or less by volume — so the same layer that solves the movement problem also gives a wet room a substrate that does not absorb water. The joints and fixings are sealed, and in showers a waterproofing membrane is applied over the boards and joints in most cases. And with thermal conductivity as low as 0.034 W/mK, the board is genuine insulation: the tiled floor above it warms faster and feels warmer underfoot.
For a renovator the practical differences are just as telling. The boards score and snap with a utility knife — no saw, no dust — and a 1200 × 600 mm board is a one-hand carry up the stairs. Where the floor build-up meets a curved plinth or bath surround, Insutile® Flex Board handles the radius that the plywood route cannot.
Plywood vs XPS Backer Board at a Glance
| Criterion | Plywood overboard | XPS tile backer board |
|---|---|---|
| Typical overboard thickness | 18–25 mm for a rigid result | From 6 mm on fully supported decks; 12.5 mm floor-grade standard |
| Added floor height | High — doors, thresholds and transitions usually affected | Low — thinner build-up for an equivalent tiling result |
| Weight on site | Full sheets are a heavy two-person lift | Around 3 kg per 1200 × 600 mm board at 12.5 mm — one-person handling |
| Waterproof | No — needs priming or tanking in wet areas | Yes — closed-cell core; joints and fixings sealed, membrane in showers in most cases |
| Thermal insulation | Negligible | Thermal conductivity as low as 0.034 W/mK |
| Underfloor heating | No thermal break — heat drains into the subfloor | Purpose-suited — insulates directly beneath the heating layer |
How to Overboard a Timber Floor, Step by Step
- Make the deck sound. Screw down every loose or creaking board into the joists, replace any that are damaged or rotten, punch or remove proud nail heads, and take down obvious high spots. The overboard stiffens a floor; it does not repair one.
- Clean and dry. Vacuum the deck and make sure it is dry before bonding — adhesive will not grip a dusty or damp surface.
- Bed the boards in flexible adhesive. Comb a solid bed of cement-based flexible tile adhesive onto the floorboards and press each board firmly into it. A solid bed, not dabs — voids under the board become weak points under load.
- Screw at roughly 300 mm centres. Fix through the board into the floorboards with screws and washers at around 300 mm centres across the board field, following the fixing pattern in the Insutile® installation guides.
- Stagger the joints. Lay the boards brick-bond so that four corners never meet at one point, and offset the board joints from the floorboard joints below.
- Tape every joint. Bed alkali-resistant joint tape over each board junction, and in wet areas seal the fixing points and the floor perimeter with the system sealant before any tile goes down.
6 mm or 10 mm and Up: Choosing the Thickness
On a floor the board is doing structural work, so thickness matters more than it does on a wall. A 6 mm board is at home overboarding a sound, fully supported deck where every millimetre of build-up height counts — but it relies on the floor beneath it for stiffness. For tiled floors that take regular foot traffic, 12.5 mm is the thinnest board we recommend, and a springy board-on-joist floor is exactly the case for stepping up the range rather than down it. From 20 mm the board also becomes a tangible thermal layer in its own right. The reasoning behind every step in the range — from 4 mm to 80 mm — is set out in our thickness guide.
If Underfloor Heating Is Going In
A timber floor is one of the strongest cases for insulation boards beneath electric or wet underfloor heating. Without a thermal break, a heating layer on an upper timber floor sends a large share of its output downward into the ceiling void below — paid for, never felt. An XPS overboard redirects that heat up into the tile bed, cutting warm-up times and running costs while doing its structural and waterproofing jobs at the same time. How the boards change a heated floor's behaviour — and which thickness suits which construction — is covered in our underfloor heating guide.
Frequently Asked Questions
Can you tile onto chipboard or OSB floors?
No — chipboard is an even less suitable tiling background than floorboards, because it swells dramatically and loses strength when it gets damp. Treat it the same way: make the deck sound, then overboard with a floor-grade XPS backer board bonded and screwed through into the deck, with the joints taped before tiling.
Do I need to take the floorboards up first?
Usually not. Sound, well-fixed floorboards are a perfectly good deck to overboard — securing loose boards and replacing damaged ones is normally all the preparation needed. Boards only need lifting where there is rot, serious damage, or a level problem that screwing down cannot cure.
How much height does an XPS overboard add?
The board thickness plus a few millimetres of adhesive bed. A 12.5 mm board typically adds around 15 mm before tiling — roughly half the build-up of a 25 mm ply overboard with its own adhesive layer on top — which is often the difference between rehanging every door and leaving them alone.
Do the screw fixings compromise the waterproofing?
Not once the system is finished. In wet areas the fixing points, board joints and perimeter are sealed with the system tape, washers and sealant, and in showers a waterproofing membrane is applied over the boards in most cases. In dry rooms the fixings need no sealing at all.
Tiling over a timber floor? Explore Insutile® Build Board, follow the full method in our installation guides, or talk to our technical team for a floor-specific specification.